JSAUX Transparent Back Plate for ROG Ally Installation
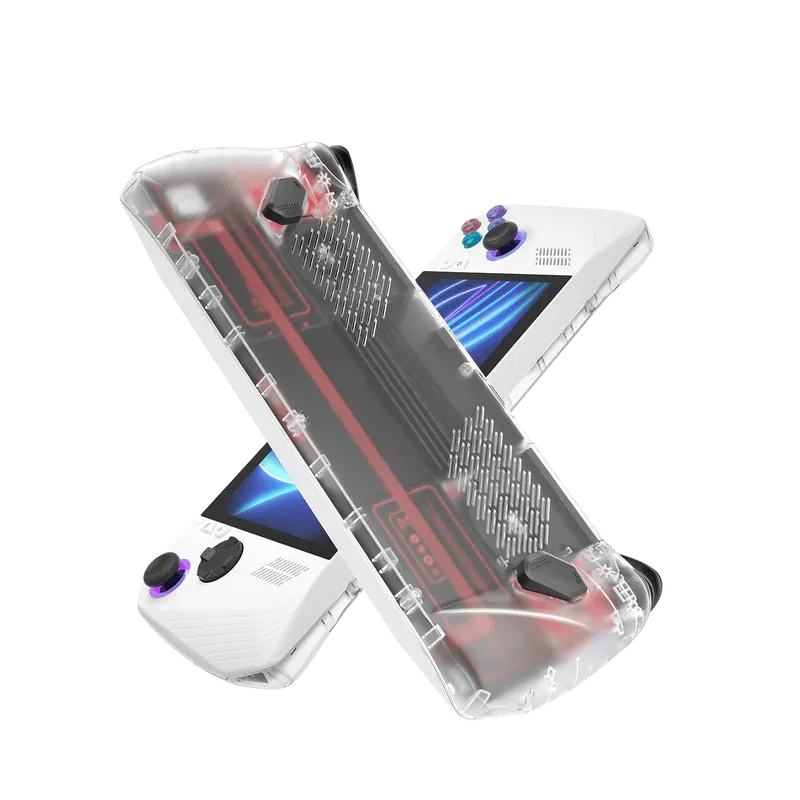
This is an overview and guide on the Jsaux transparent back panel and how to install it. This mod is pretty straightforward and should take less than a half hour. You can find more about the product on our accessory page (HERE)
Materials Needed:
- JSAUX Transparent Backplate: The star of our show.
- Precision Screwdriver: Provided in the package
- Plastic Pry Tools: Provided in the package
- Soft Cloth: To keep things tidy.
- Patience and a Sprinkle of Magic: Essential for any modding journey.
Removing the backplate and swapping the triggers
- Turn off your ROG Ally and unplug any cables. We want your device as sleepy as a kitten before we begin.
- Use your precision screwdriver to carefully remove the screws from the back of your ROG Ally. Keep these screws safe, perhaps in a tiny treasure chest or a bowl.
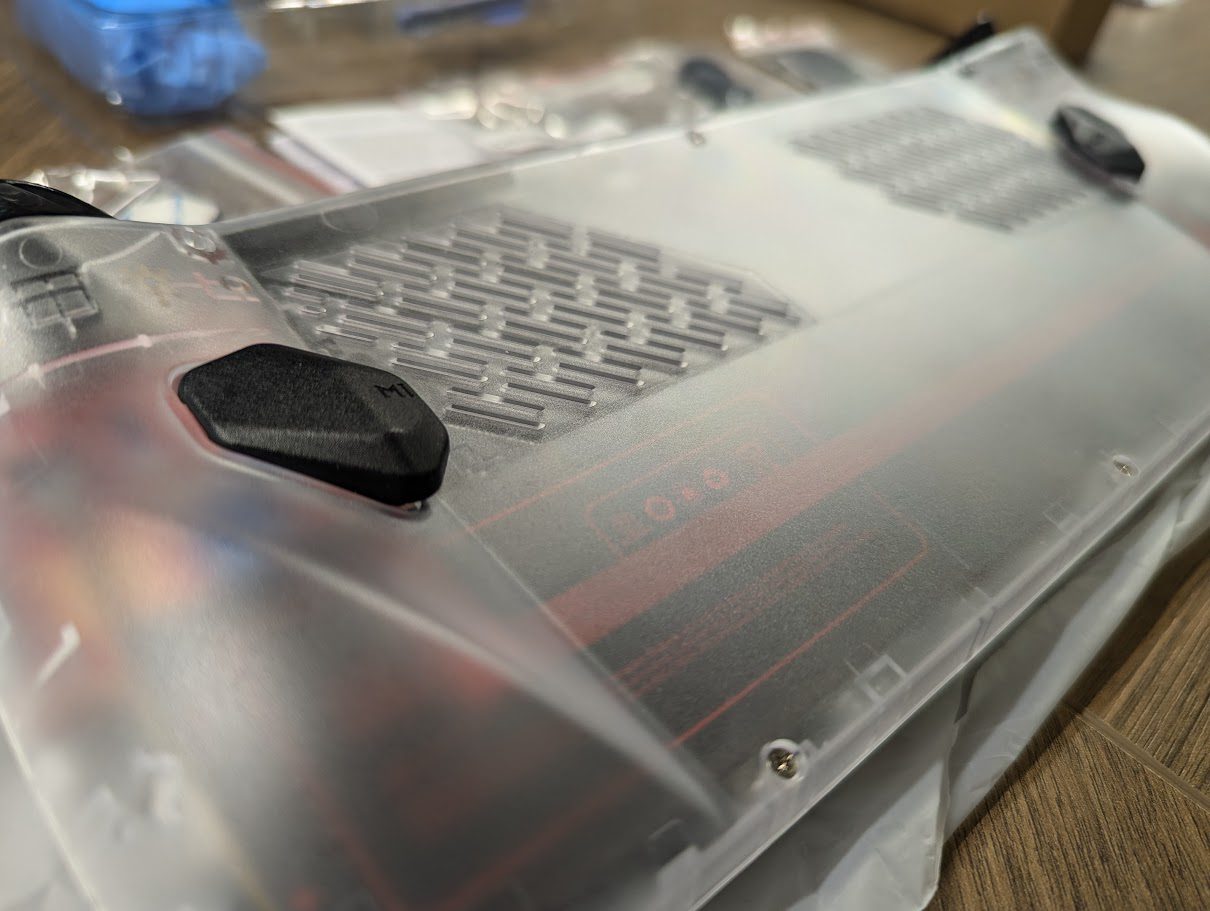
- Gently insert a plastic pry tool into the seam of the backplate. Imagine you're opening a mystical book—gentle and steady. Work your way around the edges, slowly lifting the backplate until it pops off.
- Safety first, adventurer! Locate the battery connector and carefully unplug it. This ensures your device is completely powered down, and ready for its transformation.
- Unscrew each trigger from the back shell being careful not to lose the original screws.
- Use provided screw to install the triggers into the transparent backplate.
Install stickers, heatsink, or RGB module.
- Make sure to apply the light-blocking strip and cover the light sensor or your ally will randomly power off.
- Apply the battery sticker over top of the battery or skip this step if you don't like it.
- From here we can install either the HeatSink or the RGB Module
- HeatSink Version, remove the protective film from the heat sink bottom. Remove the black film covering the console apu/ssd. Set the heatsink in place, and make sure the thermal pads are properly touching the heat pipes.
- RGB Version, install the module over the APU, and make sure the buttons and port are aligned with the top of the console.
Swap back paddles and reassemble
- From here we can swap gently unscrew the back paddles being careful not to lose the spring. Gently snap the paddle buttons in, set the springs in place, and screw it down.
- Plug the battery connector back in. Your device is now waking up, ready to show off its new look.
- Align the new transparent backplate with your device. Feel the excitement building up as you see the internals through the clear casing. Press it firmly but gently into place.
- Screw the screws back into place, ensuring everything is snug and secure. Your ROG Ally is now adorned with its transparent armor.
- Plug in your charger and turn on your ROG Ally. Take a moment to admire your handiwork. You've successfully completed the transformation!