This is a guide and general overview of how to install and upgrade your ROG Ally D pad.
Credit:
- Arcanazen: Design & Inspiration
- YesitsKira: Modeling
- Tekgnome: Project lead & Testing
Materials needed
- Precision Screwdriver Set
- Plastic pry tool
- FDM or SLA printer
- Download and Print D-Pad replacement (Here)
- X-Box elite metal D-Pad Hat from eXtremerate (HERE)
- 6x3x3mm or 6x3x2mm Magnets (Optional)
Notes:
- BY FOLLOWING THIS GUIDE YOU TAKE RESPONSIBILITY FOR YOUR OWN ACTIONS
- This shouldn’t void your warranty. You can contact customer service for better clarification based on your country, laws, and what’s allowed.
- The Red “warranty void” sticker on the battery and heat pipe does not void your warranty provided you do not damage anything inside of the device and restore it to a factory original condition before the RMA
- Be extremely careful when removing the back panel screws, paddle, and trigger screws as they can strip!
Instructions:
Printing the Parts
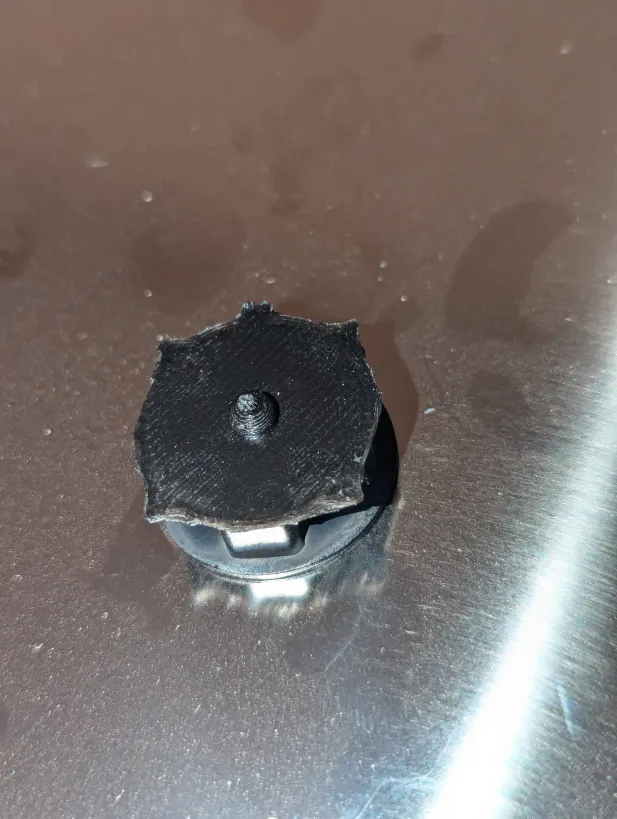
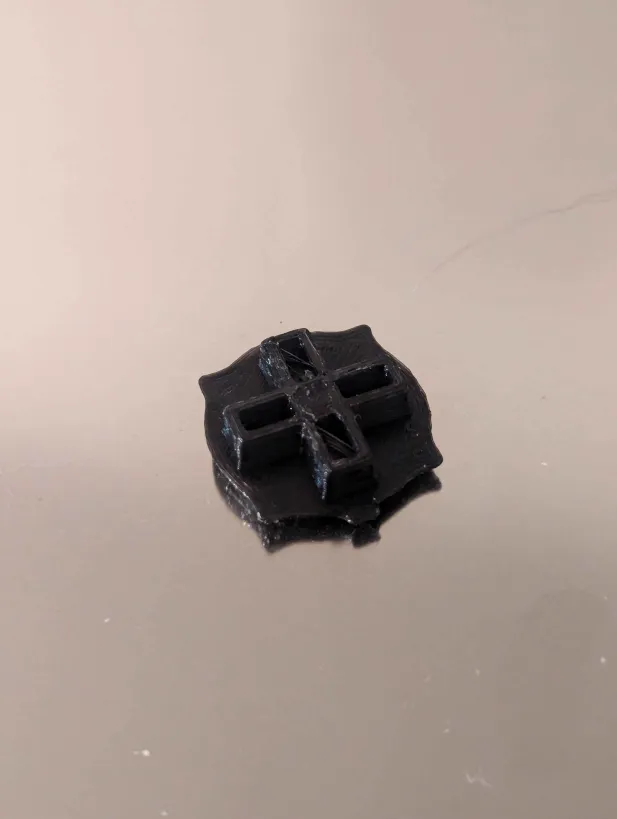
You will need to print the Dpad and the ring file from the materials needed section above.
If you want to print in RESIN, use “ROG_Ally_Elite_Magnetic_Dpad_for_resin__v1.stl”
For FDM, use “ROG_Ally_Elite_Magnetic_Dpad_v1.stl” and “ROG_Ally_Elite_Magnetic_Dpad_Pivot_v1.stl”
The ring file will work for both printing technologies.
It is extremely inportant to have a good clean part to use with the ally. Small defects in the printed part will translate into poor feedback, false inputs and even no input. You will want to make sure you have a really accurate FDM printer or preferably print it in SLA with a resin printer. You can use slight heat to heat the bottom of the metal dpad and press it into the printed part to help with clearance issues.
You can either use side snips to get the magnets out of the extremerates green dpad or obtain your own 6x3x3mm or 6x3x2mm magnets.
Depending on the quality of your prints, these magnets can either be friction fit into the holes in the bottom of the printed dpad or if they are loose, a drop of superglue in each hole will help hold the magnets in place.
Installation
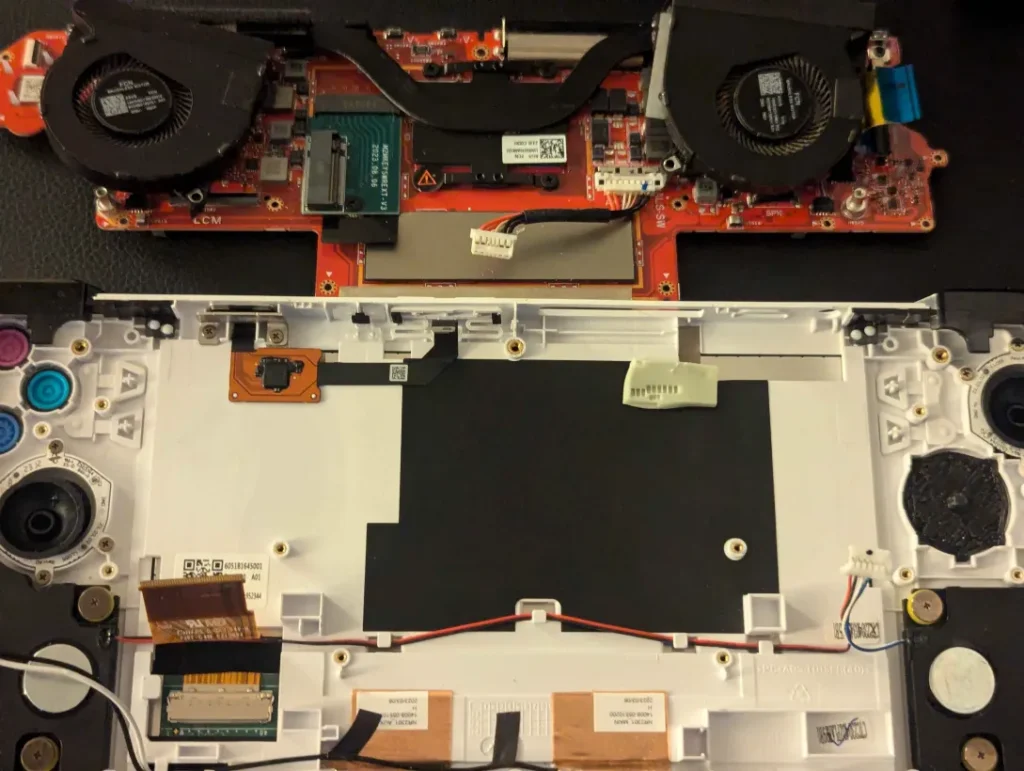
The Rog Ally is one of the easier Windows handhelds to disassemble. There are a few Red “warranty void” stickers on the battery and the heat pipe does not void your warranty provided you do not damage anything inside of the device and restore it to a factory original condition before the RMA. You can watch this awesome ifix video below on how to tear it down.
Remove the back panel and unplug the battery
- Remove the back panel and unplug the battery
- Remove the 4 screws holding the battery in place and remove it.
- Remove both joystick boards
- 3 ribbon cables
- 4 screws
- Unplug speaker cable
- Unplug fan headers
- Remove fan screws.
- Remove fans.
- Unplug 2 cables coming from the wireless card
- Unplug the display ribbon cable.
Unplug speaker connector - Remove all 12 motherboard screws.
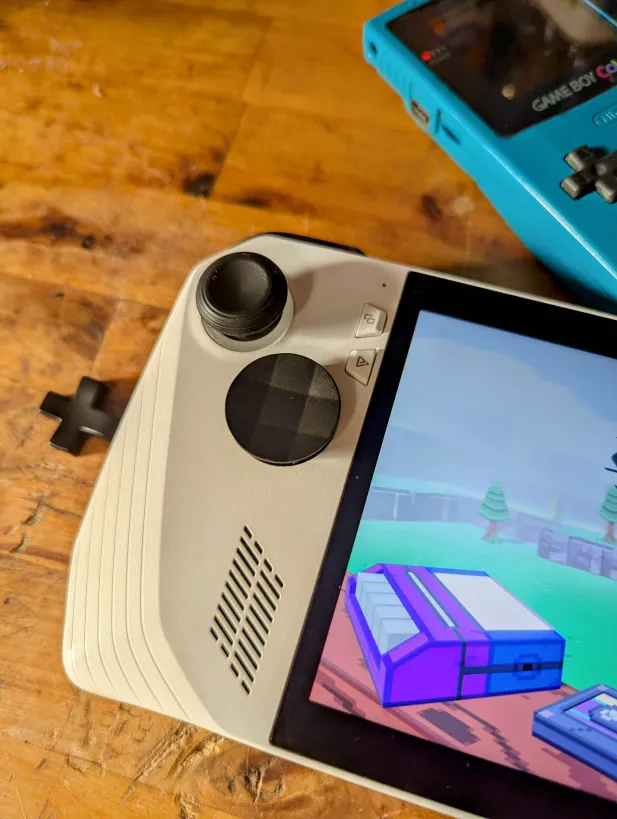
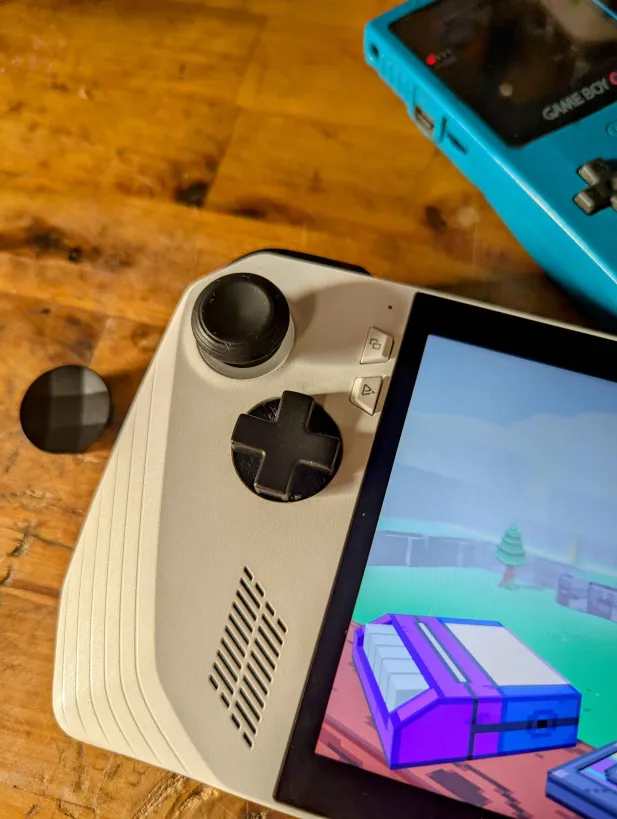
At this point, we can either Tilt and lift the motherboard out of the shell or you can just tilt the motherboard enough to get the clearance to remove the stock dpad and slide in the new one. You’ll want to make sure the bottom tab is rotated pointing downwards so it aligns correctly when installed.
Once you put the ally back together with the new DPad installed, place the printed ring over the dpad from the outside. It can be stuck down with double sided tape along the edges.