

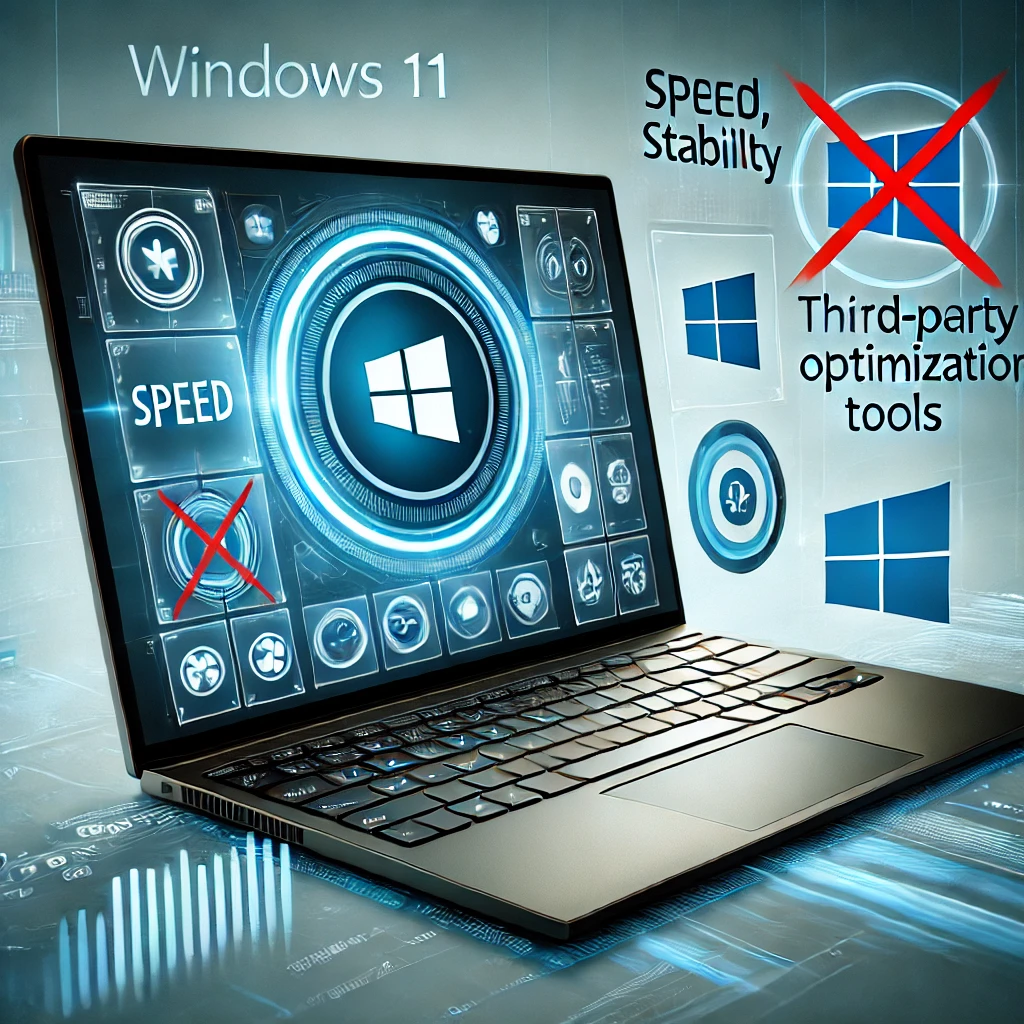
This is a guide and general overview of various ways you can optimize Windows 11 for gaming on a handheld. We don’t recommend using 3rd party optimization tools, these tools can potentially cause various issues with game compatibility, system stability and implied security risks.
This guide will cover 5 parts;
- Disabling Core Isolation
- Turning off VMP
- Turning off Bitlocker
- Adjusting visuals
- Various improvements and tweaks.
Notes:
- While generally safe you should read over each section and make sure you understand the ramifications and implications of these changes!
Instructions
– Turning off Core Isolation
Core isolation is a security feature of Microsoft Windows that protects important core processes of Windows from malicious software by isolating them in memory. You should make sure you understand the security implications before disabling this feature. Feel free to skip this section.
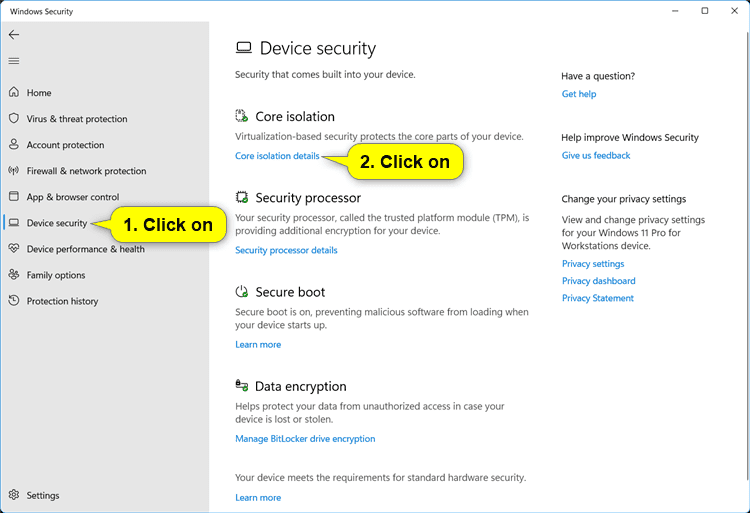
- Open Windows Security.
- Click/tap on Device Security on the left side, and click/tap on the Core isolation details link on the right side.
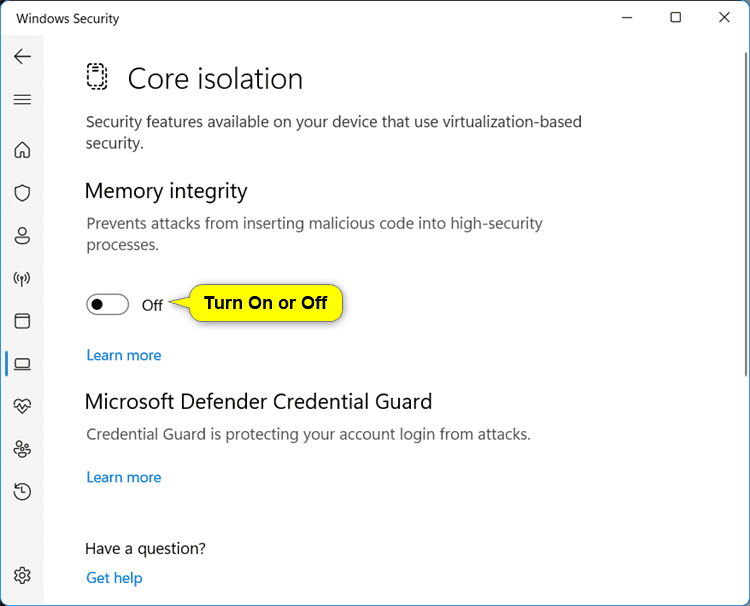
- Turn off Memory integrity for what you want.
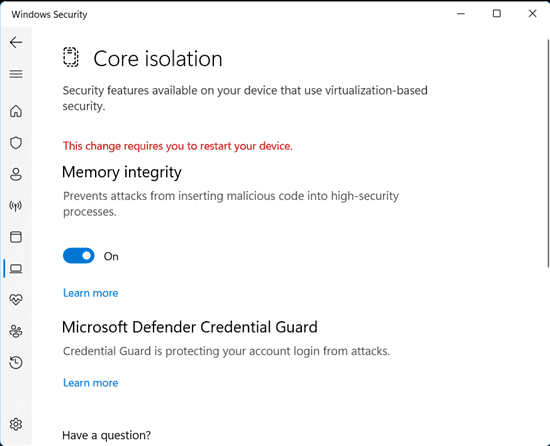
- If prompted by UAC, click/tap on Yes to approve.
- Restart the computer to apply.
– Turning off VMP
VMP provides core virtual machine services for Windows. Things that emulate Android applications may break if you turn it off. If you need to emulate an Android app please be sure to re-enale VMP to do so.
- Select Start, enter ‘Windows features’ in the search box, and select Turn Windows features on or off from the list of results.
- In the Windows Features window that just opened, find and unselect Virtual Machine Platform.
- Select “ok” and reboot to take effect.

– Turn off BitLocker
If your SSD doesn’t support OPAL, it will rely on software-based encryption rather than hardware-based. BitLocker will use the system’s CPU to perform encryption and decryption operations, which may lead to a slight reduction in system performance compared to hardware-based encryption.
- . Open Control Panel
- Press
Win + Sto open the search bar. - Type “Control Panel” and press Enter.
- 2. Navigate to BitLocker Drive Encryption
- In the Control Panel, set the view to “Large icons” or “Small icons” to see all items.
- Click on “BitLocker Drive Encryption.”
- 3. Select the Drive to Turn Off BitLocker
- You will see a list of drives with their BitLocker status.
- Find the drive you want to turn off BitLocker for.
- 4. Turn Off BitLocker
- Click on “Turn Off BitLocker” next to the drive you want to decrypt.
- 5. Confirm Decryption
- A prompt will appear asking if you want to turn off BitLocker and decrypt the drive.
- Click on “Turn off BitLocker.”
- 6. Wait for Decryption to Complete
- The decryption process will begin. This might take some time depending on the size of the drive and the amount of data.
- You can monitor the progress in the BitLocker Drive Encryption window.
- 7. Decryption Completed
- Once the process is complete, you will see a message indicating that BitLocker is turned off for the selected drive.
– Various improvements and tweaks.
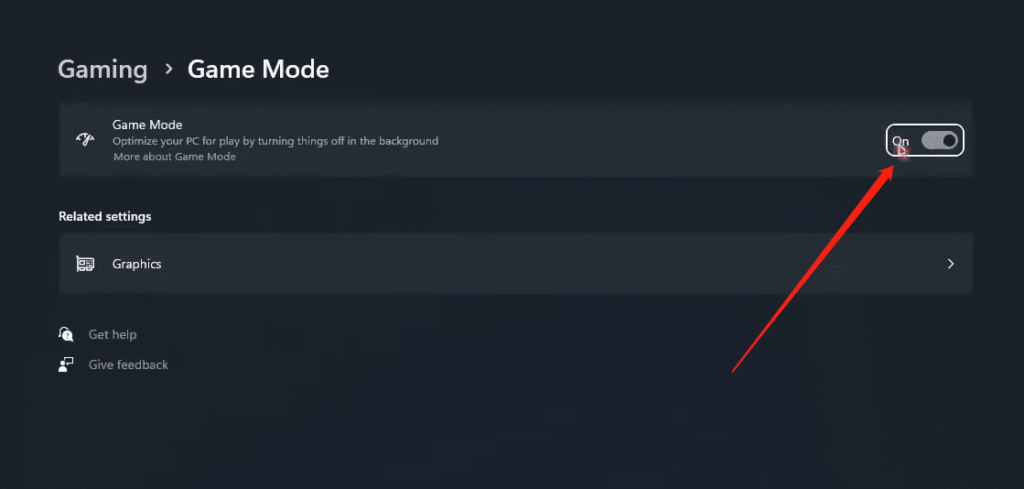
Turn on Game Mode
- Press the “Win + I” keys together at one time to open “Settings.”
- Then, search for “Turn on Game Mode” and select it from the list of results.
- Simply, toggle the switch to turn it “ON.”
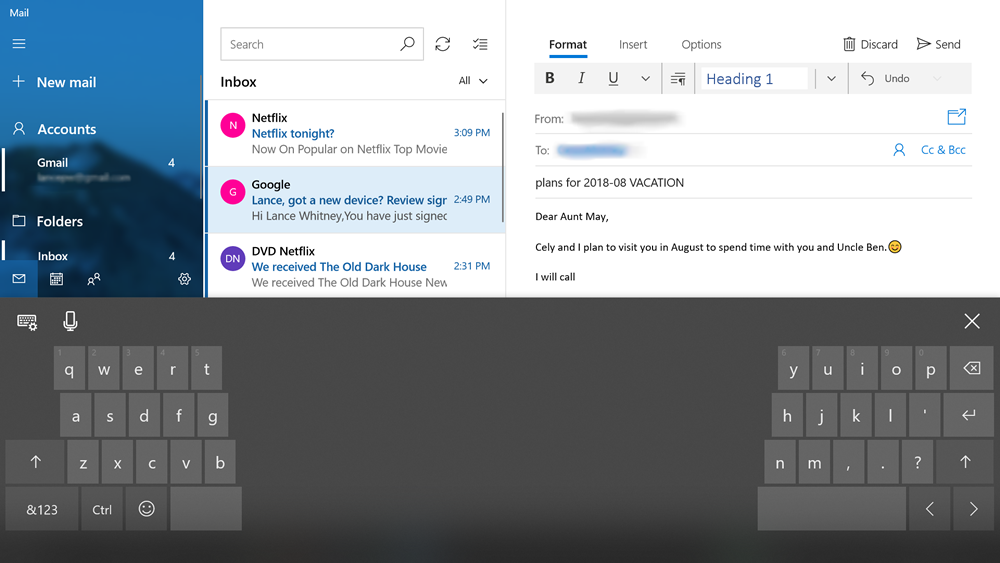
Set a split keyboard
Tap typing can be cumbersome but I found that using the split keyboard makes it significantly easier and faster to type with. This won’t be for everyone as it takes a bit to get used to but does make it SO much better over holding the device with one hand and pecking for keys.
- Open up your touch keyboard by taping into an input box
- Tap on the keyboard icon at the upper left of the keyboard.
- select the split icon to enable the split key mode.
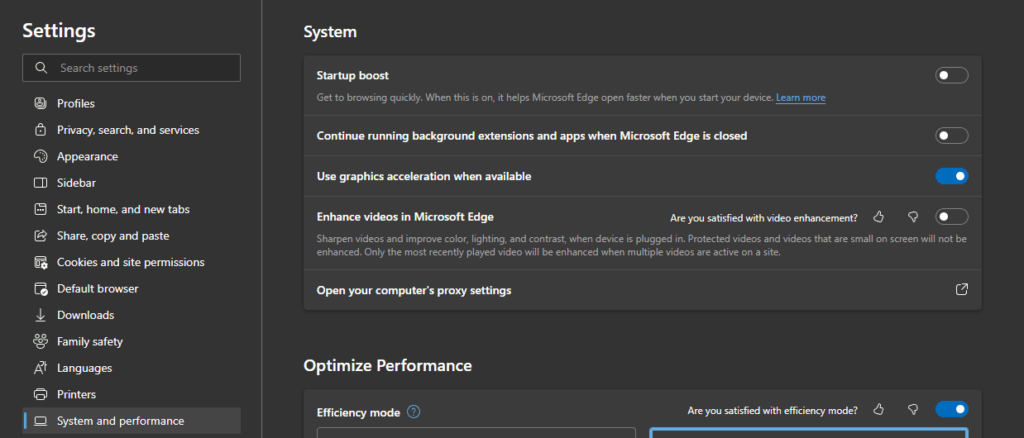
Disable Edge from Running in the Background & At Startup
- Open Edge
- click the 3 dots menu > Settings > System and Performance
- Uncheck “Startup boot” as well as “Continue running background extension and apps when Microsoft Edge is closed.
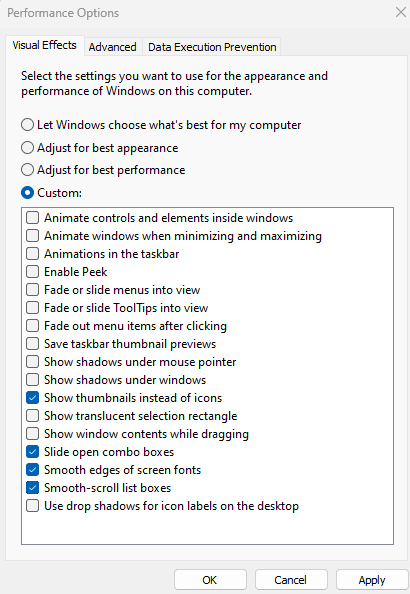
De-animate Windows
Removing Windows AERO and animations can free up a small amount of resources. Please note that while this can help outside of exclusive full-screen apps and at very low TPD the vast majority of the time it won’t make a difference. (please feel free to skip this step)
- Type “Adjust the appearance and performance of Windows” into the “Search” box, then press “Enter” to open it.
- Select “Adjust for best performance” to optimize Windows visuals.
- Next, you’ll need to re-enable some essential Windows 11 gaming settings. Manually check boxes next to “Show thumbnails instead of icons” and “Smooth edges of screen fonts.”
Optional W11 Cleanup
- Uninstall Office Installer
- Remove Teams
- Remove One Drive