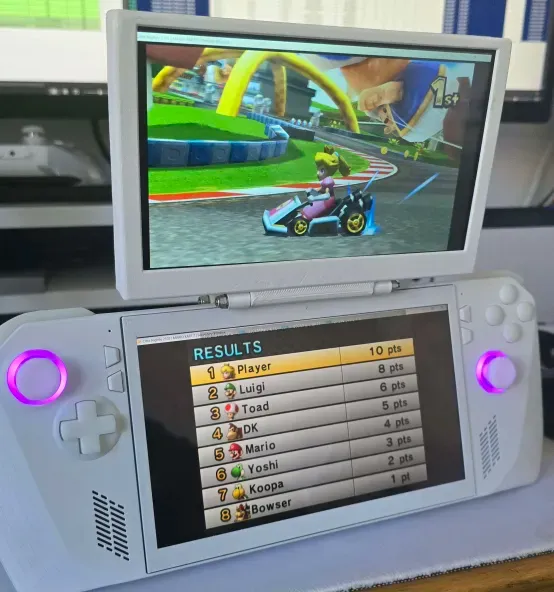
The AllyDS Mod
This is a guide and overview of the Rog Ally "Nintendo DS" clamshell style mod.

This is a guide and overview of the Rog Ally "Nintendo DS" clamshell style mod. This tutorial will let you 3d print a secondary screen that attaches to your Rog Ally and open and close in a clamshell style similar to the Nintendo DS.
CREDIT:
- Tekgnome - Inspiration
- YesItsKira - (Donate Here) Design, Build, Testing, Engineering, 3D Modeling
MATERIALS NEEDED
- 3D Printed Parts(MakerWorld)
- Screen: (UK)
- Dock: (UK)
- Low Profile HDMI: This one has a right-angle end on one side so I got two as you need flat HDMI. I couldn't find one with flat HDMI on both sides. (UK)
- Low Profile Micro USB: (UK)
- USBC Extention: (UK)
- 90mm M3 Threaded Rod: (UK)
- M3 Lock Nuts: (UK)
- M3 Washers: (UK)
INSTRUCTIONS
Putting The Screen Together:
- The screen has two HDMI ports so the outside one can be removed either by desoldering or I just snipped mine off. Same with the 3.5mm aux port. We will only be using the ports circled in red.

- Plug the screen into the ally with the dock using the HDMI and micro usb ribbons to make sure that its all working.
- Set the brightness of the monitor with the wheel while everything is connected to the dock.
- Unplug the screen so it is now off and either desolder or snip off the adjustment wheel.

- Take the dock and using a pry tool or something strong, pop off the plastic from around the ports and the plastic around the wire. Once these are removed, the actual board of the dock and wire should slide out.

- Using mounting tape, mount the dock to the back of the screen and route the HDMI and Micro USB cables.

- Drop this whole thing into the printed screen housing and feed the dock wire through the hole in the printed housing lid.
- Glue the docks usbc to the wire holder and then glue the wire holder onto the lid.
- Plug the usbc into the ally with the extension to check if everything is working. If it is, you can glue the back cover to the housing.
Mounting The Screen To The Ally:
You will need to thread the rod through the housing with a hinge part on either side. Washers are placed on either side of the hinges to distribute the pressure more evenly.
On the other side of the hinge, you need to put the hinge support through instead of the housing. Please look at the photo for reference.

Now you can place the screen on the ally and glue the hinge support to the back of your Ally so that everything lines up.
Once the glue dries, tighten the lock nuts so that the hinge has the amount of pressure to hold the screen at any angle and the mod is done!

