
Steam Deck AX210 Mod
How to install and upgrade your steam deck to a AX210 Wifi card.
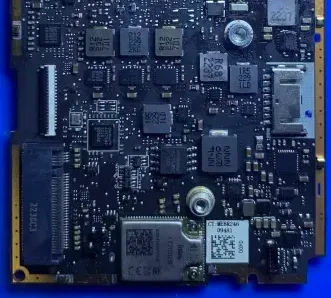
This is a guide and general overview of how to install and upgrade your steam deck to a AX210 Wifi card. Credit: Krutav Shah: Pictures, Testing, Instructions Materials needed Precision Screwdriver Set Soldering Iron Solder Flux Hot air gun/reflow station Plastic pry tool Notes: BY FOLLOWING THIS GUIDE YOU TAKE RESPONSIBILITY FOR YOUR OWN ACTIONS We strongly recommend the dehumidification process as it can make or break the job. This will void your warranty. This is an advanced mod, if you feel overwhelmed at any point reading this you should walk away. This guide is under construction, please keep this in mind as you read through it. Instructions: You can follow this awesome iFixit guide on how to disassemble the device down to the mainboard.
Remove the back panel and unplug the battery remove 8 screws holding the back panel onto the Steam Deck Gently use a plastic pry tool to separate the two halves of the Steam Deck Remove the 3 screws holding the silver shield that’s covering the SSD and battery connector unplug batter connecter Remove motherboard Unplug speaker cable Unplug fan headers Remove fan screws. Remove fans. Unplug 2 cables coming from the wireless card Remove both motherboard ribbon cables. Remove all 9 motherboard screws. Tilt and life motherboard out of shell. From here we can remove the existing wifi card. Dehumidification Process 85-100C for 24 hours is a general recommendation, but that can vary from one setup to another. It’s also important to have desiccant packs to absorb moisture. If you have a PCB heater you might be able to get away with skipping this step.